From brief through to delivery, photography workflow charts the collaborative journey between the photographer and the client. It’s so important that you feel confident, comfortable and in control throughout this process — and that you receive finished images that are not only high quality but are the right fit for your brand.
Exterior and interior photography services
Choosing the best architectural photographer to effectively capture your creativity is tough. A lot of time and dedication has gone into producing your ideas. But when it comes to their presentation on the page and on-screen, the hard truth is, your work will only be as good as the photos taken of it.
Google research found that users formed their opinions (whether to linger on a website) in as few as 0.05 seconds. Impressions are made with lightning speed and invariably through a picture. In 2022, high-quality visual marketing is everything. So it’s vitally important that the right photographer is selected; one who will showcase your talent and hard work, one who will deliver the images you’ve been dreaming of.
Perhaps you are in search of an interior or architectural photographer. Or maybe you’re curious about photography workflow and how ZAC and ZAC operates. If so, we hope this guide, detailing the processes we follow, will be useful in gaining a clearer understanding.
What are the steps to photography workflow?
Our architectural photography workflow ensures we deliver a premium service, that’s tailored to you. Here it is, in 8 steps.
1. The Photography Brief
At the top of every project, we take great care to understand our clients’ needs and requirements, because each shoot is unique. The briefing process is an integral ingredient of the photography workflow. It provides an opportunity to identify exactly what you’re looking for and sets us on the right path to producing not only the perfect images but images that are perfect for you.
Each client is invited to fill out a questionnaire, confirming all details such as the start time, access details, image quantity and so on. Depending on the information available, we may recommend a recce of the site; this is an additional service we offer and can be beneficial to better prepare for the job ahead. A recce will highlight any problematic areas, enable an assessment of lighting and allow us to scope out compositions. It involves a walk around the site taking candid photographs, usually lasts a total of 1-2 hours and contributes to a more efficient, streamlined shoot.
If it’s a large shoot or a location with limited access, we’ll make the call for Ryan and Aaron to conduct the building photography together. Once all the necessary information has been gathered, an accurate estimate can be created and sent for your approval.
2. Preparing for Shoot Day
Once the brief and estimate have been approved and a date is booked in the diary, we request that our clients prepare the property ahead of the shoot day. Areas to be photographed should be thoroughly dressed, cleaned and tidied; this includes all surfaces dusted down, windows cleaned, and beds made with minimal creases (you’ll be astounded at the details our cameras can pick up!)
It is preferable that styling is prepared in advance to keep the shoot moving efficiently — although, in some circumstances, areas can be prepped just ahead of the photographer whilst the shoot is in progress. As experienced interior design photographers, we always recommend not to over-style. Less is sometimes more. A “lived-in” appearance looks much more natural and less contrived — having some of the homeowner’s own possessions (and sometimes pets) included in the compositions can help add a real sense of authenticity. This helps the viewer to relate to the image.
Interior styling is a profession in itself and although we don’t currently offer a styling service as such, we have completed styling courses. Additionally, during our 5 years of experience working with styling professionals, we have picked up a fair few tips along the way. So we’re very happy to offer some advice as part of our interior photography services.
3. The Photography Shoot
On the day of the shoot, we operate as agreed during the briefing stage. However, there is one element that can be unpredictable and may incur some slight changes — the light. As such, we work in the manner that’s deemed best in correlation with the sun’s movements on that particular day. Mother nature’s movement is one factor we won’t necessarily be able to pre-empt during the brief, although forecasting may give us a guide.
Fortunately, we have a valuable tool to help us out. Using the SunSeeker app, we can track the path of light and stay one step ahead on the day, working with it, rather than against it. The sun is essentially our dance partner! It can be magical if in the perfect spot and a hindrance if not. So we’ll move with the rays, as and when required.
Weather analysis is particularly important when planning any shots taken using a drone (an especially valuable tool for shooting large buildings). Drone photography is only possible in certain conditions; the light direction has to be right, there must be no rain and wind speeds must be at a low level to ensure a safe flight. Naturally, we may have to adapt to conditions on the day but can use technology to help gauge them.
We arrive with a full set of professional gear. Whilst shooting we use professional architectural photography lenses, which allow us to keep the verticals straight up and down. These lenses also give us the opportunity to take two shots of the scene (i.e top and bottom) then stitch them together in post-production to create a much larger image. Selecting the most appropriate focal length for each interior/exterior ensures it looks its best, with minimal distortion. Ultra-wide lenses are only used in certain scenarios, as they distort the space and furniture within, giving a false and unattractive impression. They can, however, be handy in tight, tricky spots, so aren’t ignored.
As the cameras are not as intelligent as the human eye, multiple exposures of each composition are layered on top of one another in post-production (more on that in step 5). This means the camera is placed in a stationary position for a length of time during each composition, in order to capture all the shots required. During this time, it’s important that both the camera and the scene being captured remains the same, to avoid misalignment in the layering process.
Colour cards are also placed into each scene helping to distinguish and record the correct colours in post-production. Natural light with its unique quality is used to evoke the true atmosphere of the space, translate what’s seen with the naked eye, into the image. The occasional help of flash can be implemented to fix problems and create shapes with shadows if and when required. And if there is unavoidable hard sunlight coming into certain spaces, it’s possible to hang diffusion material over the windows to help mitigate it. And as each composition is lined up, the existing styling is tweaked to the camera (while maintaining continuity), so that the property always looks its best.
4. Initial Image Approval – Raw Photo Workflow
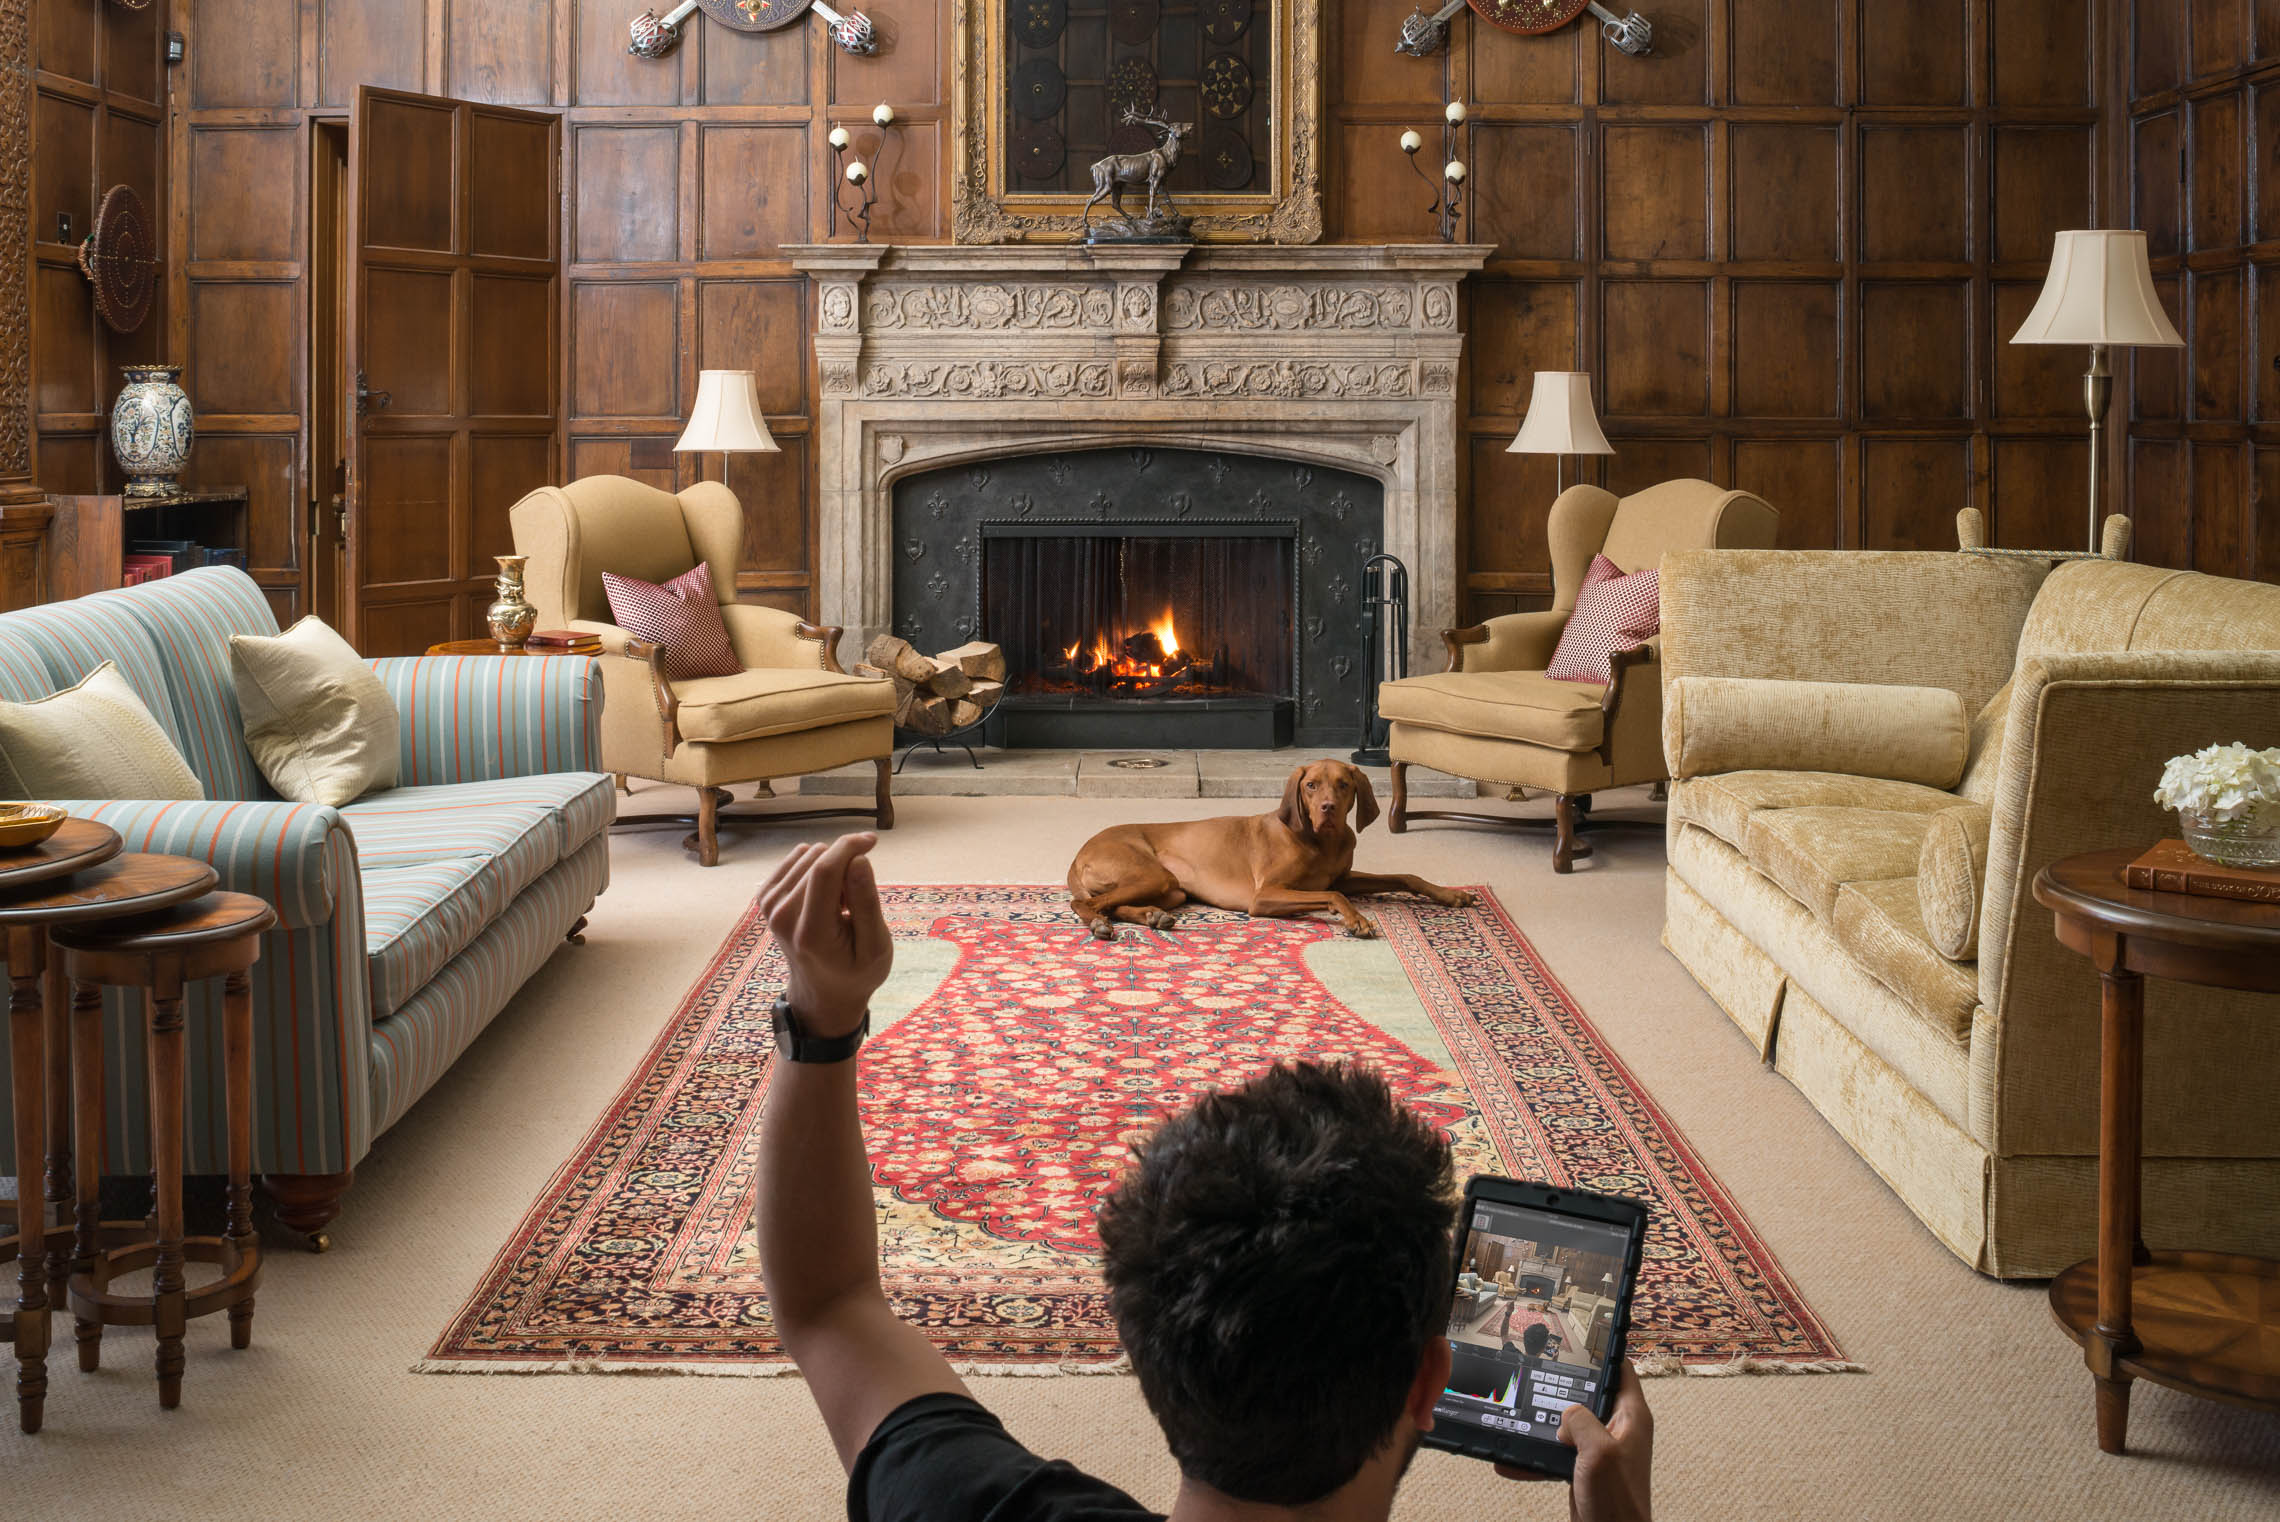
Once the shoot is complete, all of the images from the day are forwarded to the client for perusal. From here, you can browse and select a range of shots you wish to take forward to post-production and licensing. The images are sent via our customized approval software to make the process quick and easy.
5. Post Production
All approved images are then edited using industry-standard editing programmes. Our standard post-production service follows a photography workflow checklist which includes:
- Lens corrections
- Lens dust removal
- Colour and exposure corrections
- Sharpening
- Removal of unnecessary detailing (such as unsightly cables and wall sockets)
Larger objects such as televisions, artworks and window view replacements can also be added or removed if required (this is an optional premium post-production service). If you’re unsure whether this would be relevant or beneficial for your setting, we are always happy to make suggestions and offer advice.
Returning to the image layer techniques mentioned in step 5, it’s possible for us to employ a variety of exposures for each composition, blending shots together manually, to achieve full control of the desired finish. There are computer programs available for this technique, commonly known as the ‘HRD effect’. However, the results can vary quite dramatically from image to image. And the programs offer very limited control to tweak specific aspects of the scene. It’s also vital that the user has the skill and experience in using the software.
6. Approval Stage 1 (via Photography Workflow Software)
Our approval stages are two-fold. First, clients are sent all edited images via our approval software. This allows for comments on any changes (if deemed necessary). There’s so much we can do at the editing stage to fine-tune your shots — especially if we were unlucky with the light on the day. Do check out some examples of “before and after” imagery, to get an idea of what’s possible with your own images.
7. Approval Stage 2
The second approval stage provides the space needed to ensure you have exactly what you want — no detail is too small. It could be there was something you missed during the first approval stage, or that you find some inspiration of a detail you’d like added to enhance the atmosphere of the shot.
Also known as the final approval, this is where the requested changes are made and then sent back to you for confirmation. ZAC and ZAC’s double stage approval process is the gold standard in ensuring clients are 100% happy with the finished product.
8. Delivery of Completed Images
Now comes the most exciting step… It’s at this stage that the final images are delivered to you. Photographs are prepared in high res 300dpi and low res 72dpi for web (other resolutions and sizes can also be provided on request), ready for use online or in print.
Interior and architecture photography processes
Photography workflow is in essence, a description of the steps photographers take. You may find some photographers use a system with fewer steps, particularly at the editing and approval stage. It’s always worth checking a photographer’s processes before committing to working with them. This way you can be sure you’ll be getting the level of service you’re seeking — one that suits your particular project and end goals.
Our in-depth 8 step photography workflow allows us to produce the kind of premium modern architecture photography that exceeds our clients’ expectations. The finished product can be used on brochures, flyers, posters and in glossy magazines, as well as in a digital format. It’s always very exciting to view your interior or architecture in a high profile periodical, or on a huge billboard. But you do need to work with a professional who’ll provide images of suitably high quality.
Whether you’re seeking exterior building photography, restaurant photography, or interior photography services, we would be more than happy to help with your project. If you are interested in working with us, do take a look at our portfolio of work and contact us to discuss how ZAC and ZAC can best showcase your own creativity.
Related Questions
How do I choose an architectural photographer?
Buildings and interiors require a different approach to say, portrait photographer. We recommend you view examples of photographers’ similar previous projects, check out their press links and read their testimonials to be sure they have the skills and experience you’re looking for. An informal chat can also help identify if they’re someone you’ll enjoy working with.
What makes a good architectural photographer?
Training, experience and an eye for detail are fundamental in becoming a good architectural photographer. Having a high spec tool kit is vital from a technical perspective. But it’s also about having the kind of approach that ensures that the client is heard, as well as being responsive to their business needs and creative ideas.
How do you price your interior photography?
A briefing process is a useful tool in identifying what’s involved in a project, including the cost. The price will vary according to the complexity of the job, how long it’ll take (full ad half-day shoots are available) the size of the building or room/s, the distance and any special requirements you may have. You can contact us for a conversation about your project and estimate.
